Making a Science Fiction Urban Area
 After my first Command Horizon game (by Baccus 6mm), and after looking at the photos I'd taken of the game, I realised that
I seriously needed to make some terrain for table top gaming. One of the first things I wanted to make
were some buildings.
After my first Command Horizon game (by Baccus 6mm), and after looking at the photos I'd taken of the game, I realised that
I seriously needed to make some terrain for table top gaming. One of the first things I wanted to make
were some buildings.
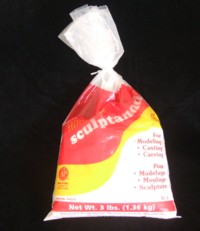
I had recently discovered Amaco Sculptamold, a 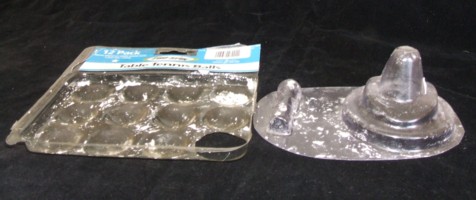 product that reasembles plaster of paris
but is less messy, and is much lighter when dry. For moulds, I had some plastic packaging that came
with a set of ping pong balls I had bought to make 'bogies' for Full Thrust, plus the packaging
from some hardware attachment we'd bought for the house, plus the plastic
product that reasembles plaster of paris
but is less messy, and is much lighter when dry. For moulds, I had some plastic packaging that came
with a set of ping pong balls I had bought to make 'bogies' for Full Thrust, plus the packaging
from some hardware attachment we'd bought for the house, plus the plastic  containers left over from some
Kinder Surprise eggs.
containers left over from some
Kinder Surprise eggs.
So, I mixed up some Sculptamold, put it in the moulds, left it for a day, popped out the structures,
left them to dry properly for a couple of days, and then set to work on them. I filled any pitting
with 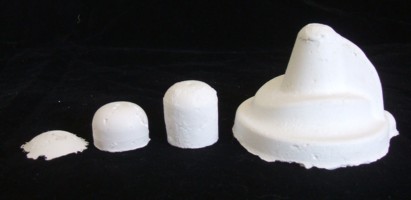 Selley's Rapid Filler - a filler product from the local Hardware store used for filling
nail holes, etc - and sanded off the excess when dry.
Selley's Rapid Filler - a filler product from the local Hardware store used for filling
nail holes, etc - and sanded off the excess when dry.
Command Horizon uses 60mm x 60mm bases for company-sized units. I noticed on their website, that the Baccus 6mm guys also appear to base their terrain on similar sized bases. I happened to have some 3mm MDF sheet in the garage so I whipped up a dozen 60mm x 60mm bases. I discovered that I could only fit one or two structures per base, but this looked okay. I attached the structures with PVA glue and left them to dry. When dry, I undercoated in black (I use to use Games Workshop Chaos Black for undercoating but have switched to a bulk water-based black I bought from the local Hardware store), and then painted the structures GW Codex Grey.
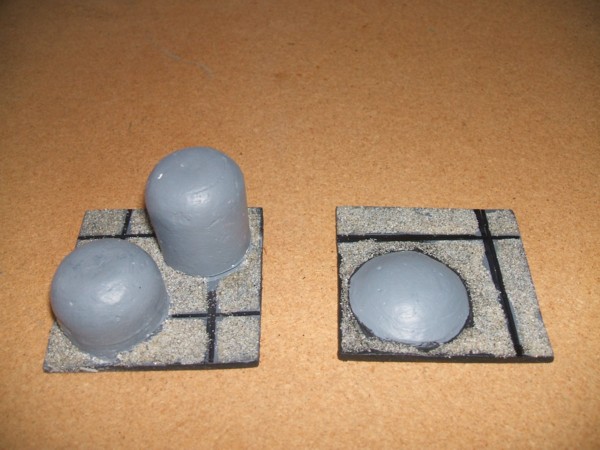 The bases of the structures and factory had been painted Tamiya XF-24 Dark Grey. Quite by accident, I discovered that as all the bases were the same size, and all the structures were
the same size, if I ruled lines on the bases at certain angles, they lined up across all the bases.
With these lines, or roads, or mag lev lines in place, I painted the exposed parts of the
bases with a PVA and water mix and dusted it with sand for texture. When dry, the sand was painted with a further coat of Tamiya Dark Grey and then the transport links were re-inked with a felt tip pen.
The bases of the structures and factory had been painted Tamiya XF-24 Dark Grey. Quite by accident, I discovered that as all the bases were the same size, and all the structures were
the same size, if I ruled lines on the bases at certain angles, they lined up across all the bases.
With these lines, or roads, or mag lev lines in place, I painted the exposed parts of the
bases with a PVA and water mix and dusted it with sand for texture. When dry, the sand was painted with a further coat of Tamiya Dark Grey and then the transport links were re-inked with a felt tip pen.
The building structures were now coming along nicely and so I turned my thoughts to the object I had cast in the hardware attachment packaging. This structure was much larger and, to me, seemed to be some sort of factory or arcology. When placed 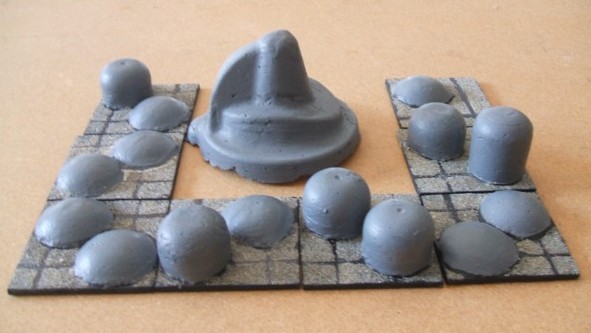 with the existing building structures, which were all curves and domes, it's lines seemed to match theirs, which, while unplanned, was an effect I was aiming for - some sort of 'unity of architecture'.
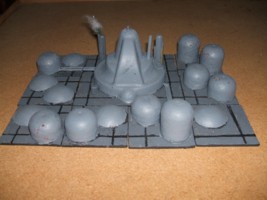
When I saw the trial set up (pictured) I realised that the factory arcology would actually fit very nicely on a 120mm x 120mm base, which would align it with the smaller building bases. The factory base was duly cut out and the factory glued to it. We happened to have some wooden dowel pegs left over from building a sewing desk for my wife, and a few of these were quickly converted into cooling towers for the factory base. I then raided my bits box for other odds and ends to dress the factory.
A few years back I painted up an English Civil War Army. I had labouriously cut off all the lead alloy pikes from some 60-odd pikemen, drilled out all the hands and replaced the alloy pikes with 2mm piano wire (I hate the look of wonky pikes). Loath to throw away potentially useful 'half-pikes', I had hung on to a bunch of them. I now found that the mallability of lead alloy, which makes for poor pikes, was just what I needed to mould external pipes over the surface of my factory.
The surface pipelines were either 2mm plastic rod, or the rod-like parts of some electronics packaging my wife picked up through her work. I cut very thin polystyrene blocks and mounted these where the piplines crossed base edges. These 'pumping stations' helped hide the join between the pipes on different bases.
 Some of the pitting from the molding process stubbonly refused to go away, even after sanding (or I missed it when using the filler). I decided to incorporate this 'damage' as 'ageing' and so painted the pits GW Terracotta. This made the building appear as if it had suffered damage or decay that had removerd the exterior sheathing to expose the core material the building was constructed from.
I added a vapour cloud to the top of the flare pipe (made from 2mm plastic rod), attached to one of the dowel cooling towers. I teased out some cotton wool and then added a blob of black paint to the end that would ultimately be attached to the pipe. I then added a bit of red and yellow around the black, before finishing with some blue in the centre of the black. Unfortunatly, this worked better in theory than practise.
I toyed with the idea of adding some greenery to the complex but ultimately decided that I wanted a stark, industrial look. I have two building bases left over from the nine piece factory set and want to try a slightly softer finish, but that's another project.