Basing 6mm Grav Tanks
When I got interested in trying out Dirtside II/Command Horizon I was in the fortunate position of having a number of plastic Renegade Legion 6mm grav 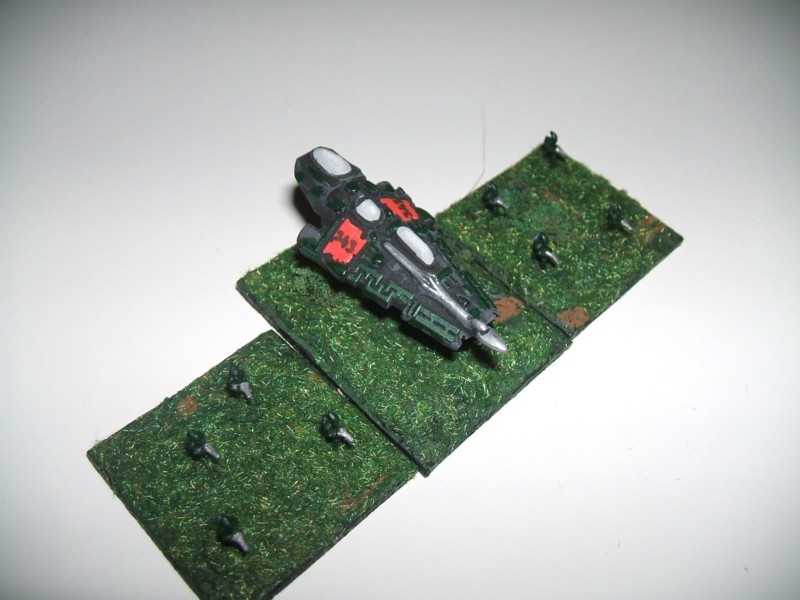 vehicles in my possession. The first job was to find a suitable way of basing these vehicles up for use.
Some years earlier, a friend of mine had shown me a set of Modern wargames rules he was working on called Red Storm. I started working on a Science Fiction variant called Plasma Storm which didn't get very far. But during that process, I experimented with basing up some Games Workshop Eldar Falcon tanks and Eldar Guardian infantry. I used some thick card for the bases, through which I drilled a hole and mounted the tank on a piece of wire.
When it came to basing the Renegade Legion tanks, I decided to use 3mm MDF for the bases as this would give the wire flight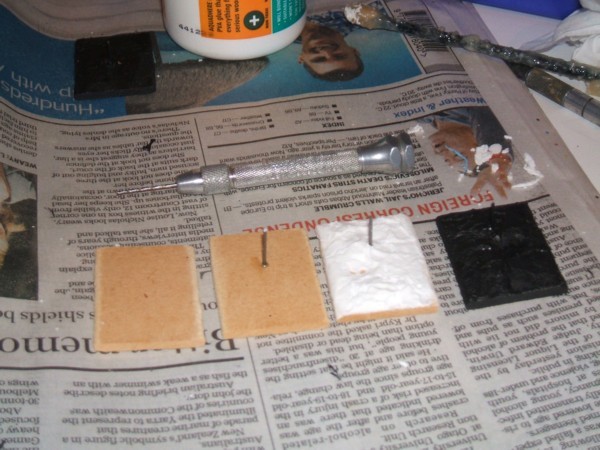 pegs more support. As I also intended to fully texture the bases with Selleys' Rapidfilla, I wanted a basing material that would be less prone to warping than cardboard.
So, the first step was to cut the bases out of the MDF sheet. I had decided to retain the 30mm x 40mm base dimensions as these worked very well with the models I was using. I then drilled a hole through the base with my hand drill and glued in a length of 2mm wire. The length of wire varied between 8mm and 15mm, so across a unit, each vehicle would be at a slightly different height.
Once the flight wires were firmly glued in place, I coated each base with a layer of Selleys' Rapidfilla - available from hardware stores and used to fill cracks, nail holes, 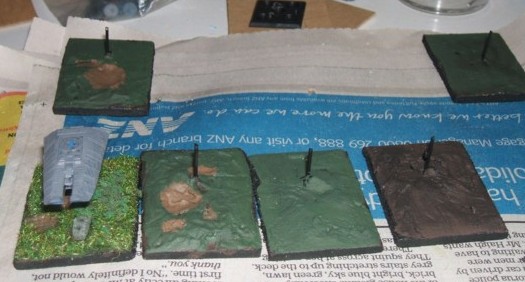 etc, around the house - and moulded it into undulations, craters, and other landforms. Rapidfilla would work equally as well on cardboard, but has to be applied thinly as the moisture content in the 'filla is prone to warping the cardboard. Once the Rapidfilla was dry, I undercoated all the bases, and flight wires in black.
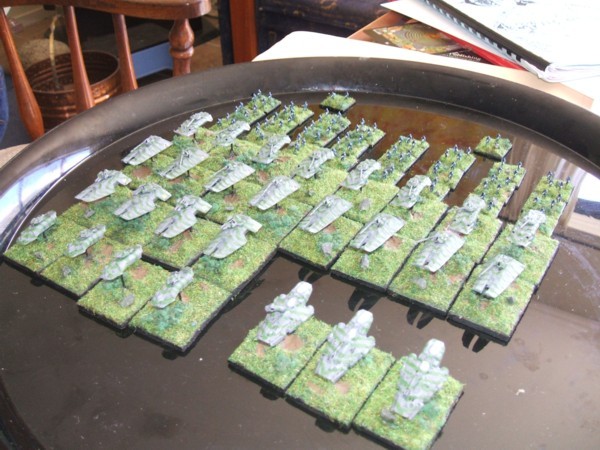
With the undercoat dry, I painted the bases a dark brown. Ordinarily, I would paint the edges of the bases the same colour as the top ground colour but this time I decided to leave the edges black. This clearly defines the base and causes it to stand out from the base cloth.
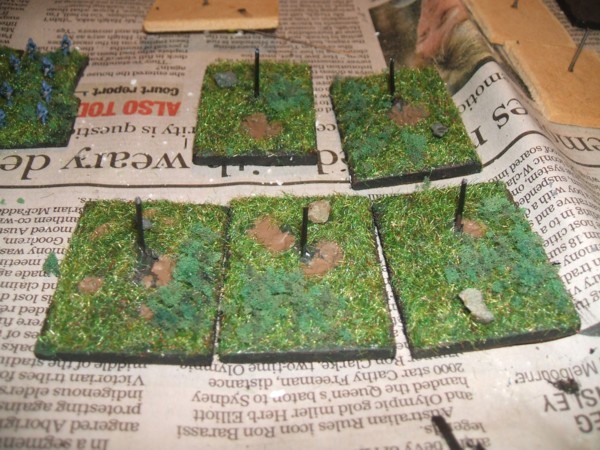 Once the brown base colour was dry, I painted the bases with a dark green top colour, and then painted the holes and craters a lighter earth brown. At this stage I also glued on small pieces of gravel as boulders. Once all the paint and glue was dry, I painted the green areas of the base with a mixture of PVA glue and water, and then dusted with flock. Areas such as craters, which did not receive the PVA/water mix, did not retain the flock and so exposed the turned-over 'dirt' beneath.
Lastly, I created brush or patches of bush by sticking clumps of foam rubber fragments - sold pre-dyed from Model Railway shops as a heavy duty flock - on to the grass.
The flight wire was left painted black - and I retouched the black paint once all the flock was dry. I then matched up the vehicle model with the approximate position of the wire and drilled a hole into the base of the model.
While the bases were drying from their earlier painting, I under-coated and painted the base hull colour of the vehicles (it was easier doing this while the vehicles were still attached to their sprues). When this was dry, I removed the vehicles from their sprues and touched up the anchor points.
 |
When all the paint and flock was finally dry, it only took a drop of Super Glue 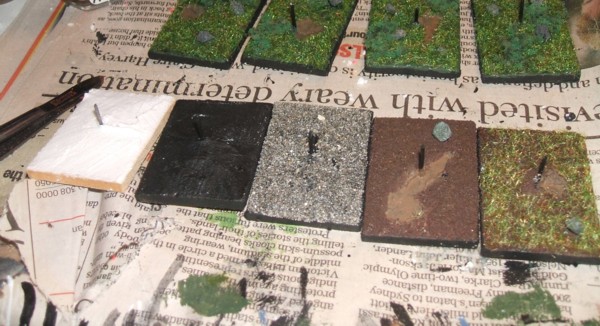 to fix the vehicle hull to the flight wire. Final camouflage and the attaching of the turrets basically finished off the models.
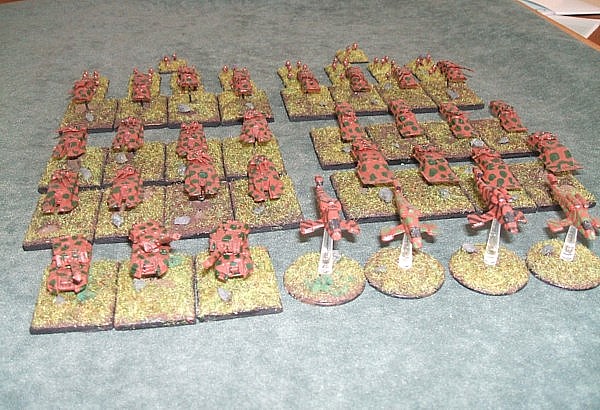
For the opposing force, I tried something a little different. Once the undercoat was dry, I coated the base with a PVA/water mix and then dusted with fine sand. I then painted the sanded base with shades of brown. I used a brown mix flock to give the impression of steppe or savannah grass to finish off the base.
I again used some of the green foam chip flock for bushes, as green things on the savannah either have access to a water source, or are particularly nasty or hardy.
 |
 About the time I received some 6mm Kra'Vak vehicles and infantry from Ground Zero Games, Beth Fulton was writing some short stories set on Mars during the pivotal 'Siege of Sol' period of the GZG Future History.
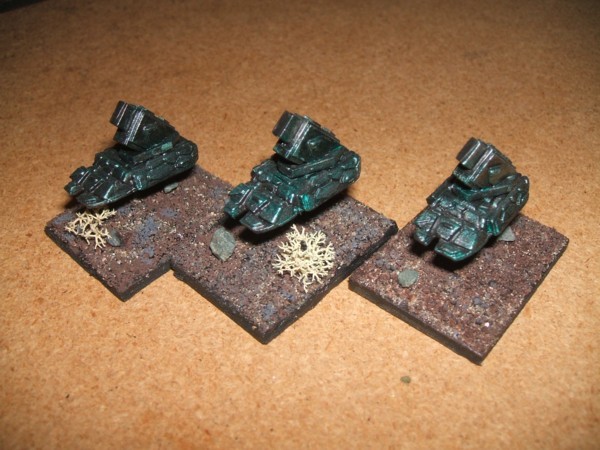
Beth's descriptions of a partly terraformed world 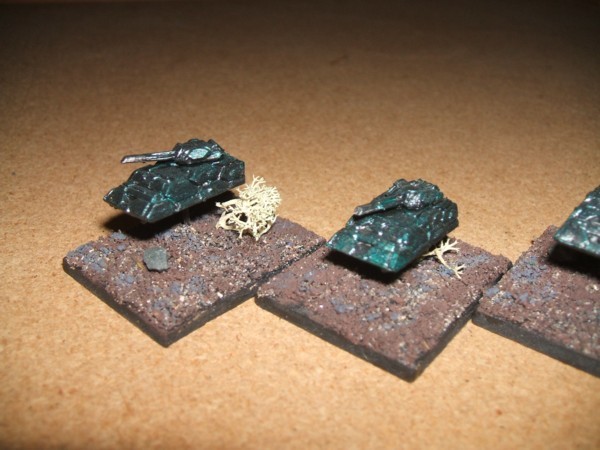 inspired me to try something slightly different for my Kra'Vak. This time, I used a coarse sand, rather than the fine sand I had used on the second lot of Renegade Legion vehicles. After undercoating in black, I then painted the sand with shades of brown and highlighted with Tamiya XF-24 Dark Grey. Rather than flocking the base, I glued on some pale lichen I got from the local Model Railway shop. This gave the appearance of hardy thorn bushes growing in the harsh Martian enviroment.
I use Games Workshop flight stands for all my 6mm VTOL craft assembled so far. I treat the bases of the flight stands exactly the same as the grav vehicle bases - except I don't texture the bases with Rapidfilla. This means that the affiliation of any detached VTOL can be determined quickly in the heat of battle by simply looking at the base.