1st Battle of Temple Hill

Background
During the Covid-19 lockdown, I decided to finally break out some figures and try out my copy of Dragon Rampant from Osprey Publishing. This was going to be a solo game so I decided to use Rally Round the King, originally from Two Hour Wargames and now on Drivethru.RPG, to set up the terrain and the opposition battle plan.
I planned to use some of my 15mm Fantasy collection to play the game, and set up a 3' x 3' battlefield on the dining room table.
Setup
Malichor the Magnificent was Royal Wizard in the court of King Lysander III of Mantineia. A series of unfortunate incidents resulted in the death of Lysander, and the arrest of Malichor by Lysander's son and heir, Klerides. Malichor, now renamed Malichor the Malignant, escaped from Mantineia and fled into the Harrowed Waste. Lying south and west of Mantineia, this area of broken and hilly terrain was the haunt of bandits and goblinoid tribes. With a few loyal companions, Malichor established a small hold and slowly build up his strength, while he plotted to take Mantineia and seize the throne.
In due course, Malichor began to test the borders of Mantineia. After some preliminary raiding, Malichor lead a band of his supporters and allies across the border with the aim of attacking the town of Karporthia. Phormion, Count of Karporthia and Lord of the South March, received tidings that raiders were approaching and hastened south with such force as he can muster to guard the border at Temple Hill.
The Forces
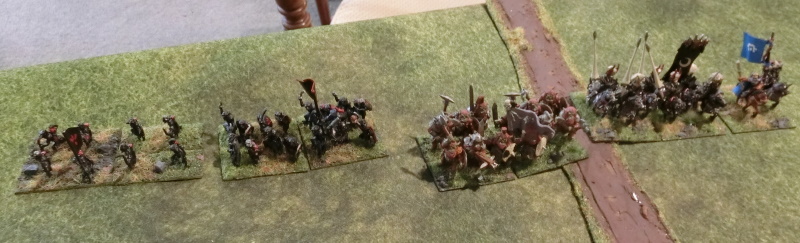
Malichor's Horde
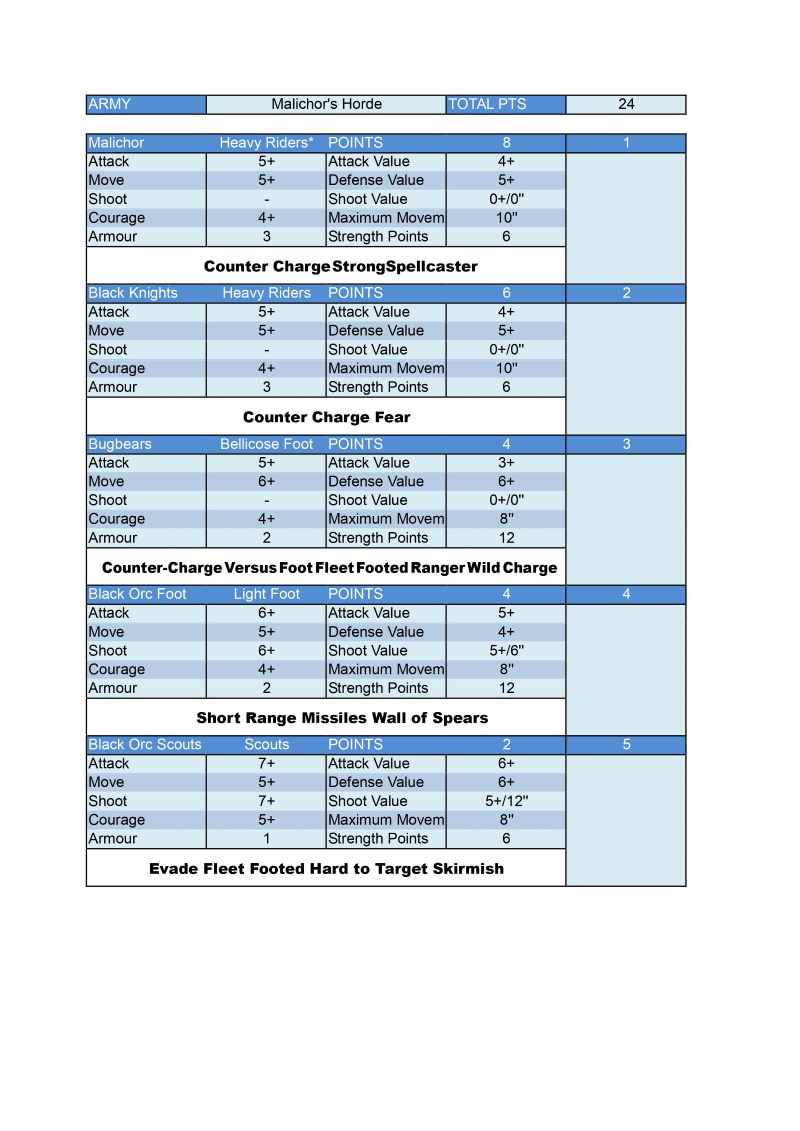 |
Malichor's escort, and the Black Knights are the supporters who followed him into exile. The Black Knights are a mix of Dark Lance 1 and Dark Lance 2 from Ral Partha Europe.
The Bugbears and Black Orcs are amongst the Goblinoid tribes living in the Harrowed Waste. The Black Orc Light Foot are also armed with darts or javelins to give them a bit of extra punch. The Bugbears are from CP Models' 20mm Fantasy Range, while the Black Orcs are from Alternative Armies' Orc Horde and Mountain Orc Horde packs.
Count Phormion's Levy
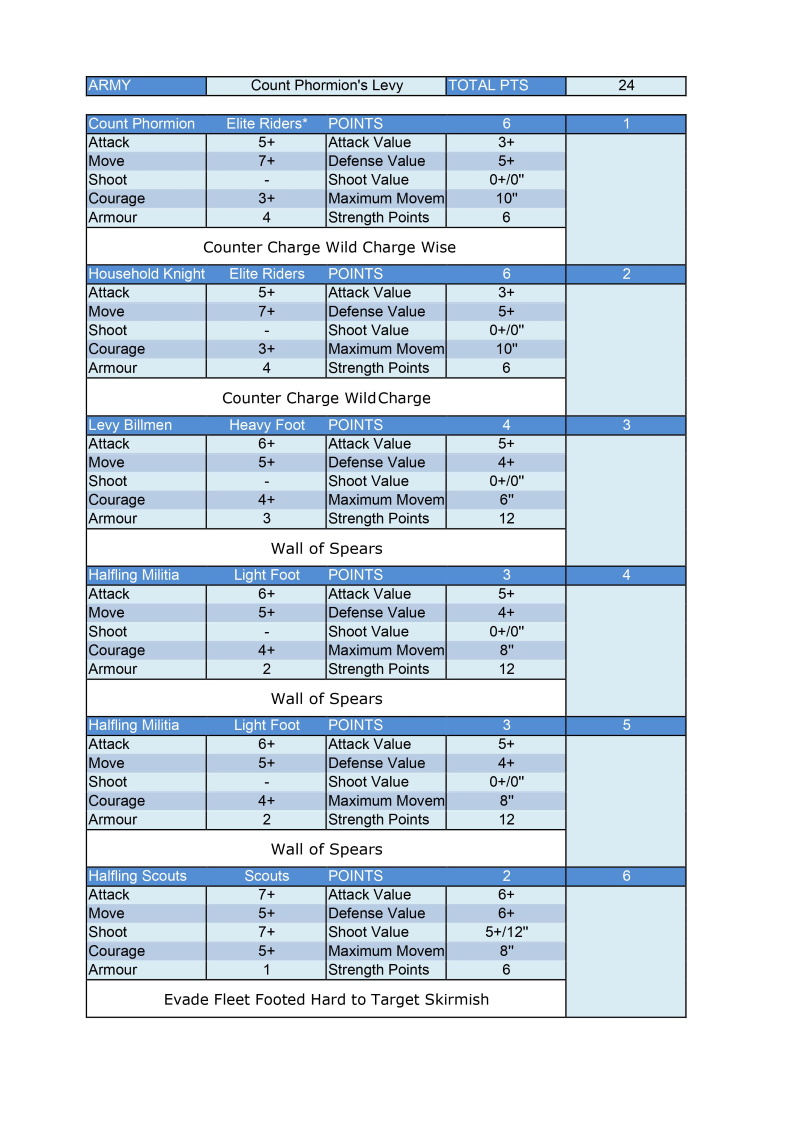 |
Count Phormion's escort, his Household Knights, and the Levy Billmen are all troops that Count Phormion can mobilize from the town of Karporthia. The figures are all from the Eureka Miniatures Men of Grandeur range.
The Halfling militia are raised from the local Halfling community of Long Bottle. Halfling figures are from Splintered Light's Halfling range.
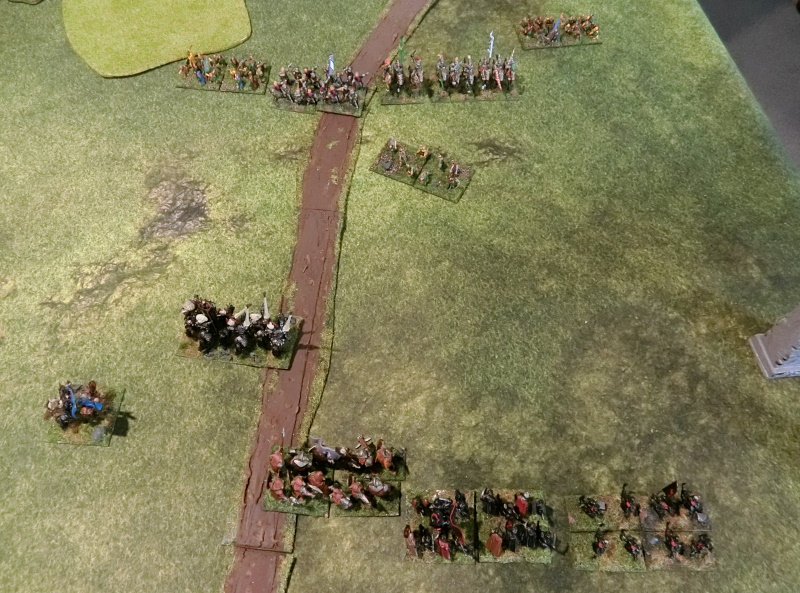
Attacker/Defender, Battlefield and Battle Tactics
These were all set up as per Rally Round the King. Malichor is obviously the attacker.
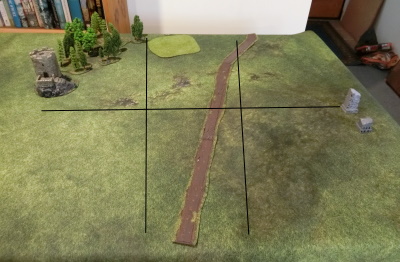 I realised later that I should have divided the field into nine sections - I actually only devided it into six. Basic terrain type was Rough, which fitted in rather well with the idea of this area being on the edge of the Harrowed Waste.
From the top left, I rolled Woods, Gully, and Open. From the bottom left, I rolled Open, Open, and Hill.
The tower by the wood was just a piece of scatter terrain, which also marked the edge of my 3' x 3' table. Though it also fitted in with the idea that this was a border region with a watch tower. The gully was delineated by a green terrain base from my terrain box.
The hill at the bottom right corner has a couple of ruined pillars on it - these are all that remain of an ancient temple and what gives the local area its name.
The road runs north from beyond the Harrowed Waste to the town of Karporthia but, otherwise, has no effect (besides making the table look nice).
For Battle Tactics, I classified Count Phormion as Type A (as per the Rally Round the King). I rolled Penertrate Centre which suggests the objective is to push through the enemy centre, while refusing the flanks to prevent encirclement.
With all this set up, deployment and then battle could commence.
The Battle of Temple Hill
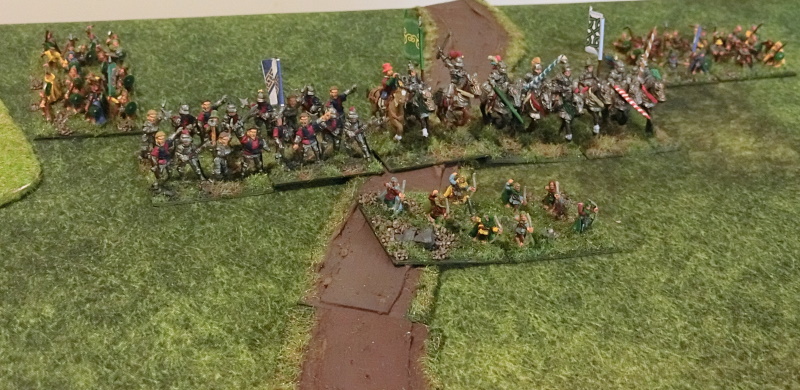 |
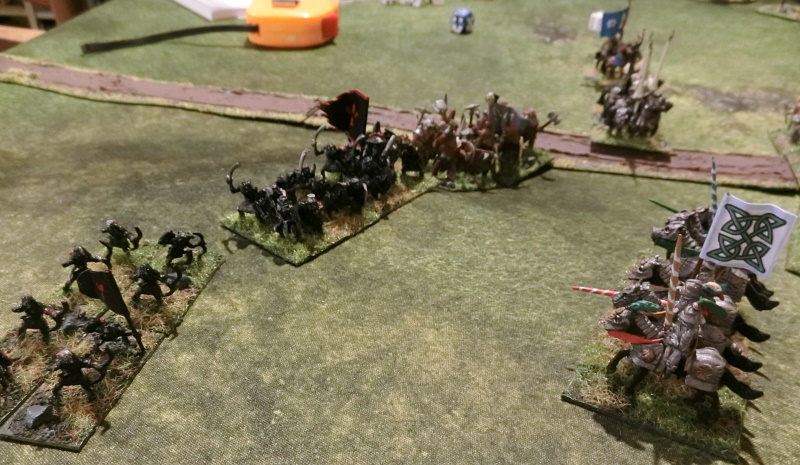
Count Phormion's force deployed across the Karporthia road with the right flank, a column of Halfling militia, resting on the gulley. To the left of the Halfling militia, Count Phormion's centre deployed - the Levy Billmen, Count Phormion and his escort, and Phormion's Household Knights. A second unit of Halfling militia held the left flank. A unit of Halfling Scouts were deployed in front of the main body.
 |
Malichor's raiders advanced from the south, deploying as they came. On the right flank, Black Orc Scouts began advancing up Temple Hill. To the left of the Scouts, a unit of Black Orc Light Foot moved up in support. And to the left of them, a unit of Bugbears formed the centre of the line. The Black Knights and Malichor and his escort formed the left of the line.
 |
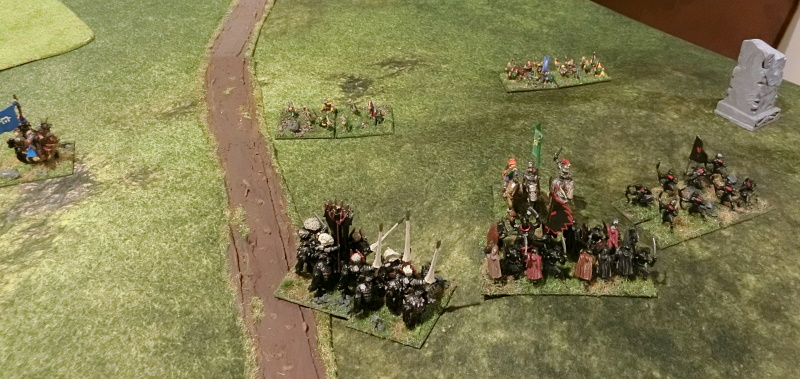
As Malichor's horde advanced, the Black Knights began to draw ahead. Once the Halfling militia had advanced south past the gulley, they deployed into line on the right flank of Phormion's force. The Halfling Scouts began to move to their right to bring the advancing Black Knights into range of their bows.
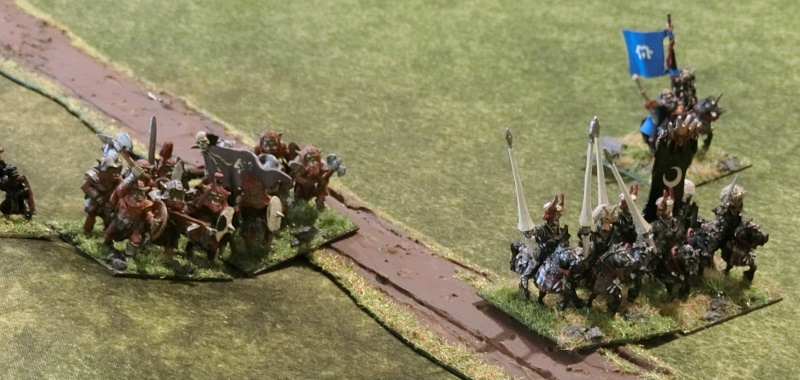 |
The Black Knights pushed forward, only to be met with a hail of arrows from the Halfling Scouts. Malichor's infantry paused their advance, while Count Phormion's Levy pressed forward. The Black Knights held firm under the Halflings' bow fire, but hesitated as the Halflings released a second flight.
 |
The Black Knights charged Phormion's Levy Billmen, inflicting damage but taking more. The battered Knights fall back.
 |
Malichor fires a Fireball into the right flank Halfling militia unit, inflicting some damage and driving them back towards the gulley. The rest of the infantry on both sides hesitate.
 |
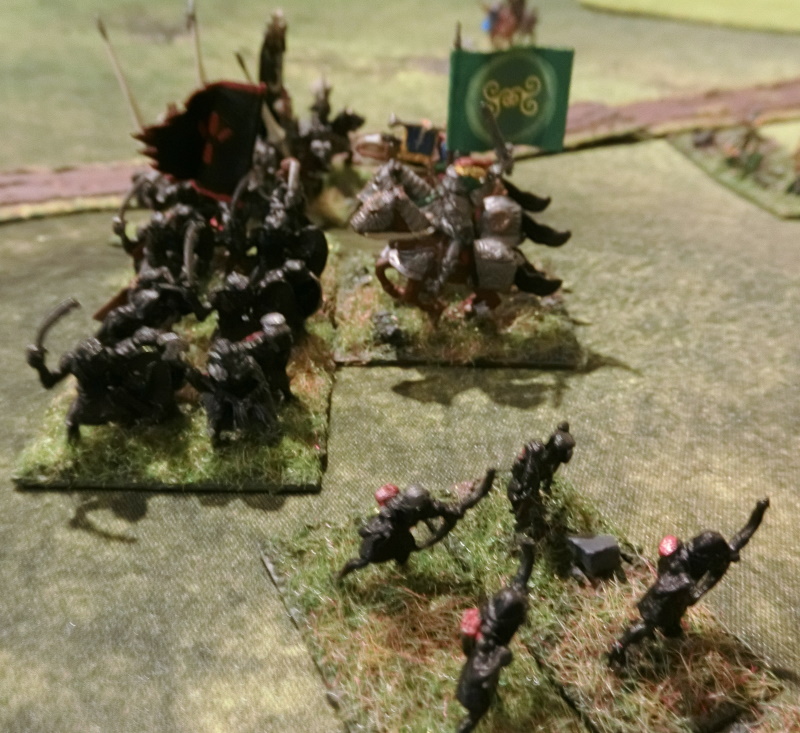
While the Black Knights rally, the Bugbears and Black Orcs advance. The battered Halfling militia unit falls back further as the Halfling Scouts and the Household Knights push forward.
The Bugbears advanced towards Phormion's Household Knights, while the rest of Malichor's Horde hesitate. The Household Knights Wild Charge the Bugbears, inflicting a lot of damage and forcing them to fall back. The Levy Billman crowd forward towards the Black Knights.
The Bugbears Wild Charge Phormion's Household Knights, who Counter Charge them, battering the Bugbears and forcing them back again. Malichor and his bodyguard charge the Levy Billmen, but are driven back. The Black Knights then charge the Levy Billmen, who retreat in Fear from them.
The Black Orc Light Foot launch a hail of darts and javelins at Phormion's Household Knights, driving them back, while the Halfling Scouts drive the Black Knights back with a well-aimed volley of arrows.
Then, Phormion's Household Knights charge the Battered Bugbears again, scattering them in rout. The rest of Malichor's Horde hesitate, but Phormion's Levy hesitate as well.
 |
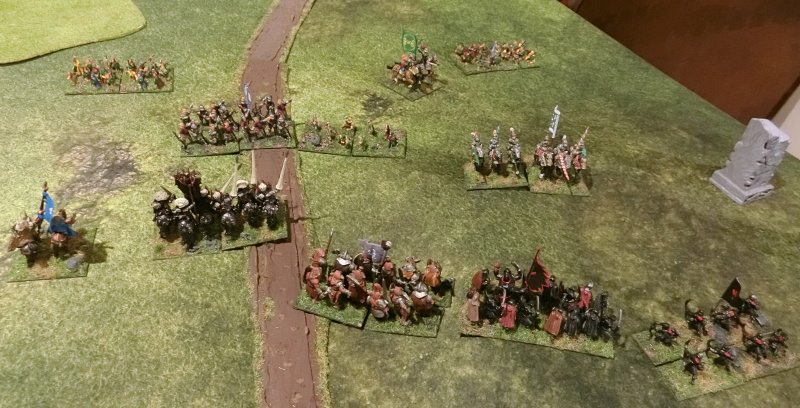
Both the Black Orc Light Foot and the Black Orc Scouts shower Phormion's Knights with darts and arrows, to little effect. Malichor and his bodyguard charge the right flank Halfling militia, routing them. The Black Knights charge Phormion's Household Knights, who break and flee in Fear of the Black Knights.
Phormion and the left flank Halfling militia begin advancing up the Temple Hill towards Malichor's right flank, while the Levy Billmen attack Malichor, who counter charges them. The Billmen are battered and driven back. Malichor then fires a fireball into the Levy Billmen, routing them.
 |
Phormion and his bodyguard charge the Black Orc Light Foot, push them back, and then rout them.
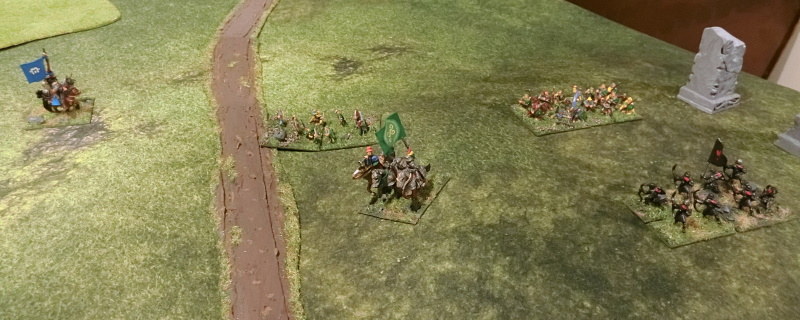 |
The Halfling militia attack the Black Orc Scouts, who fail their evade. After a vicious hand to hand fight, the Halfling Militia is repulsed, while the Black Orc Scouts fall back. Phormion and his bodyguard charge the Black Knights, who fail to Counter Charge. Phormion and his bodyguard rout the Black Knights.
Realising his invasion had failed, Malichor withdraws the remnants of his force into the Harrowed Waste, vowing to return.
Total Game Length: 14 turns
A fun battle, and I enjoyed the Dragon Rampant rules. The failed activation roll causing turn over is an interesting part of the game - several times one, or both, sides moved very few units before losing the initiative.